Han & Leia
05 Jan 2021 - Ollie Jones
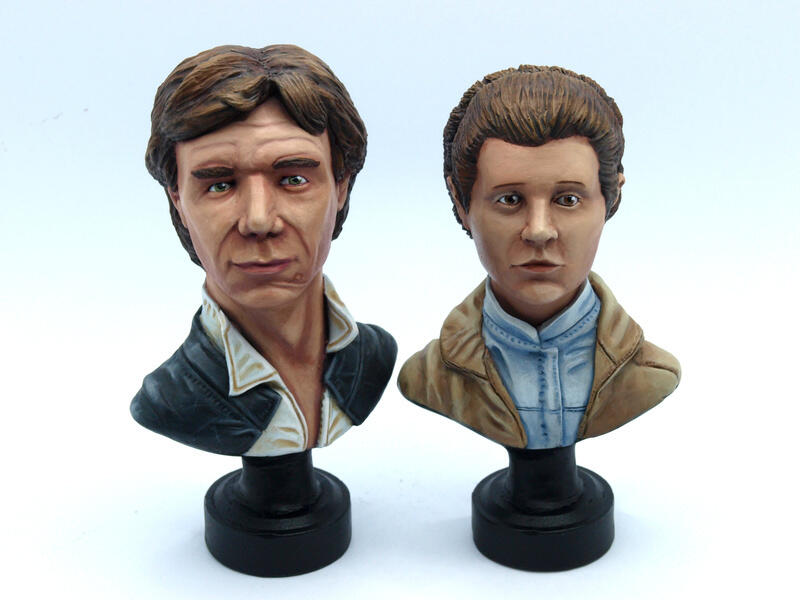
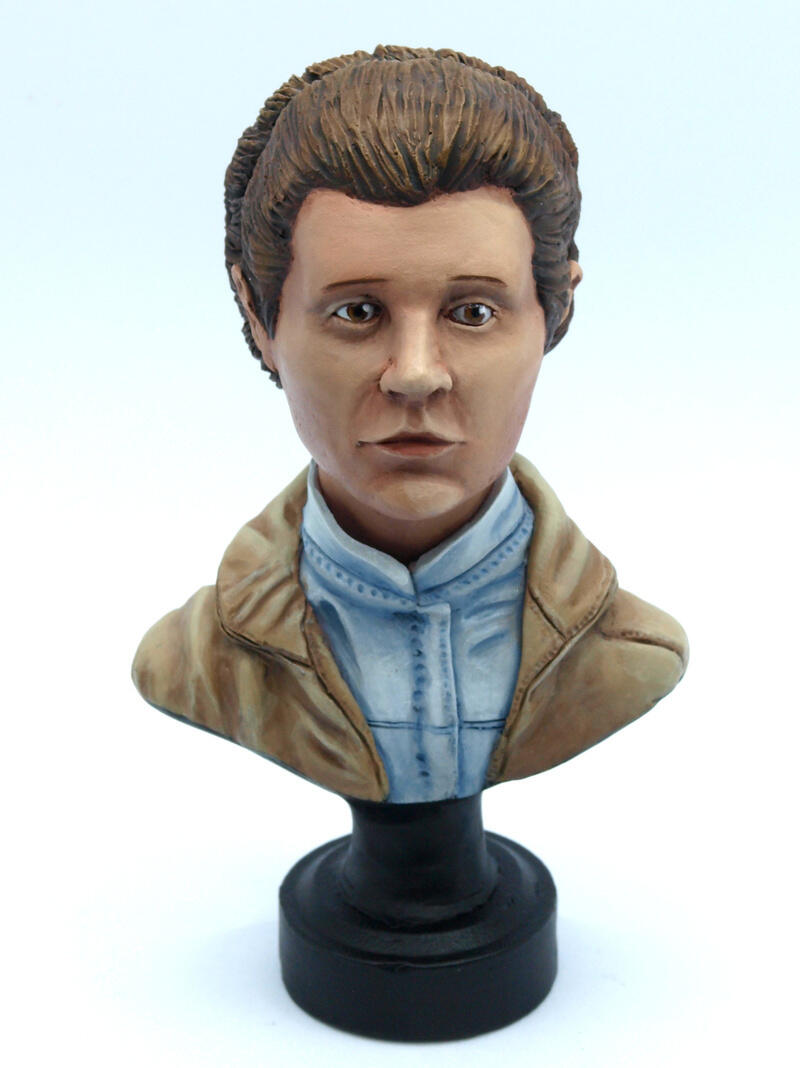
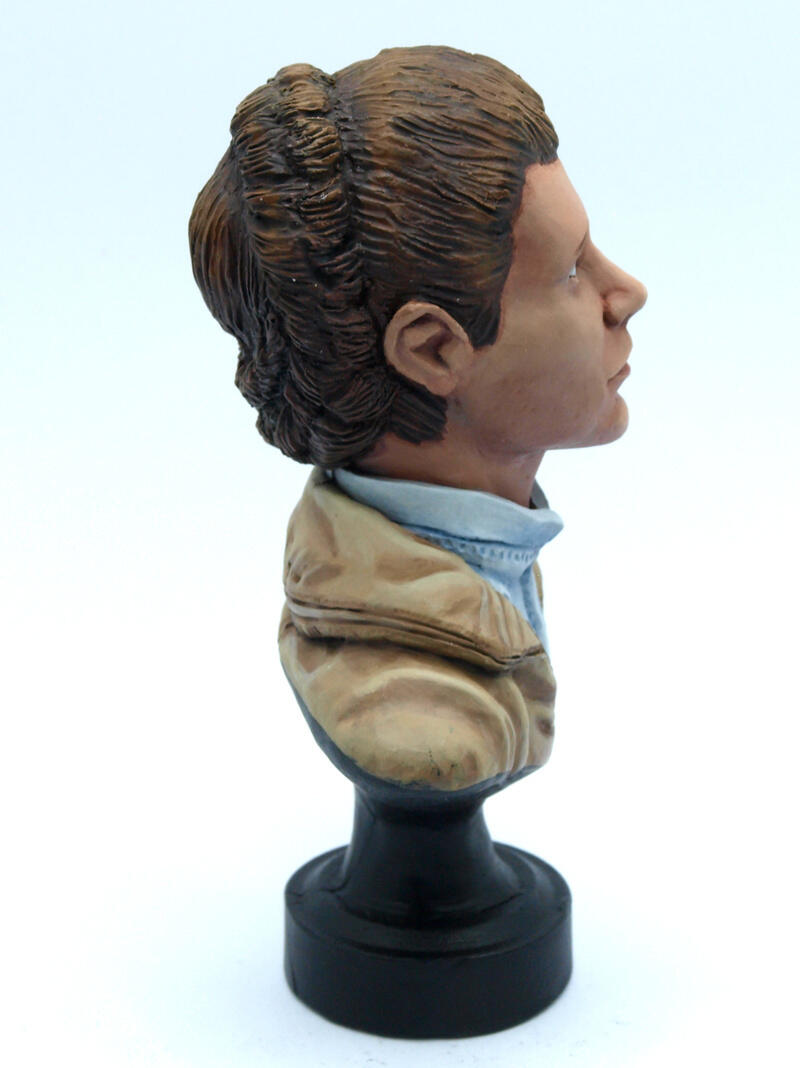
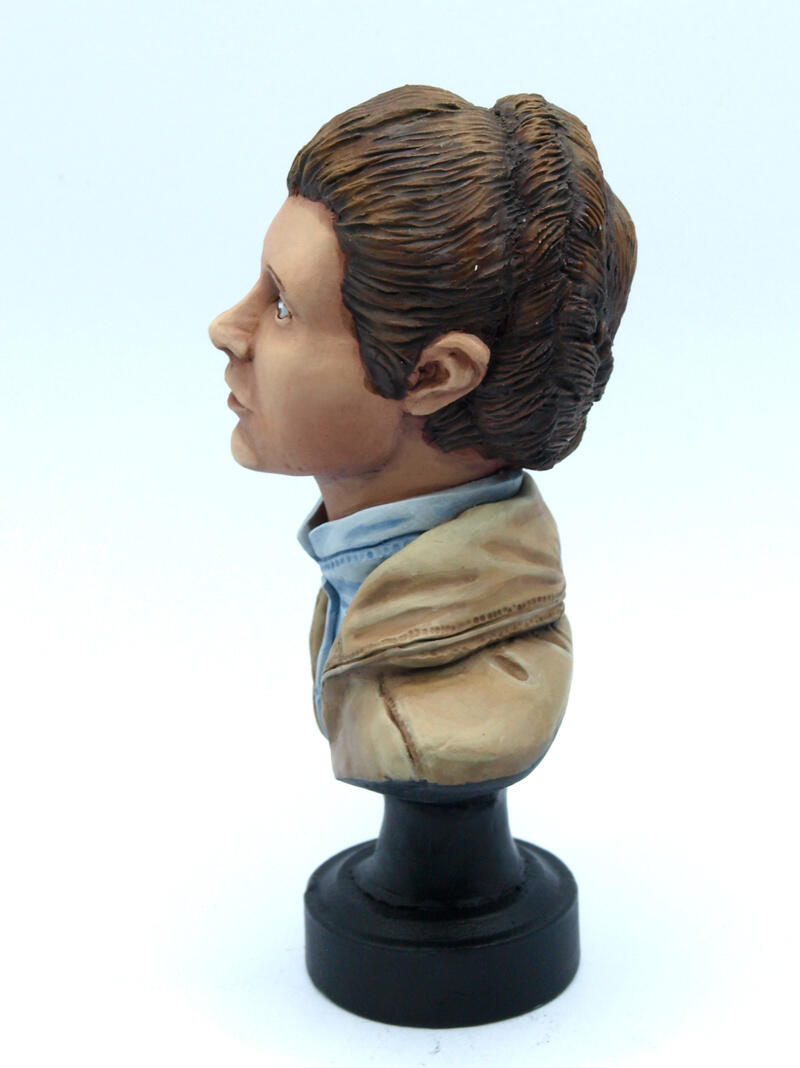
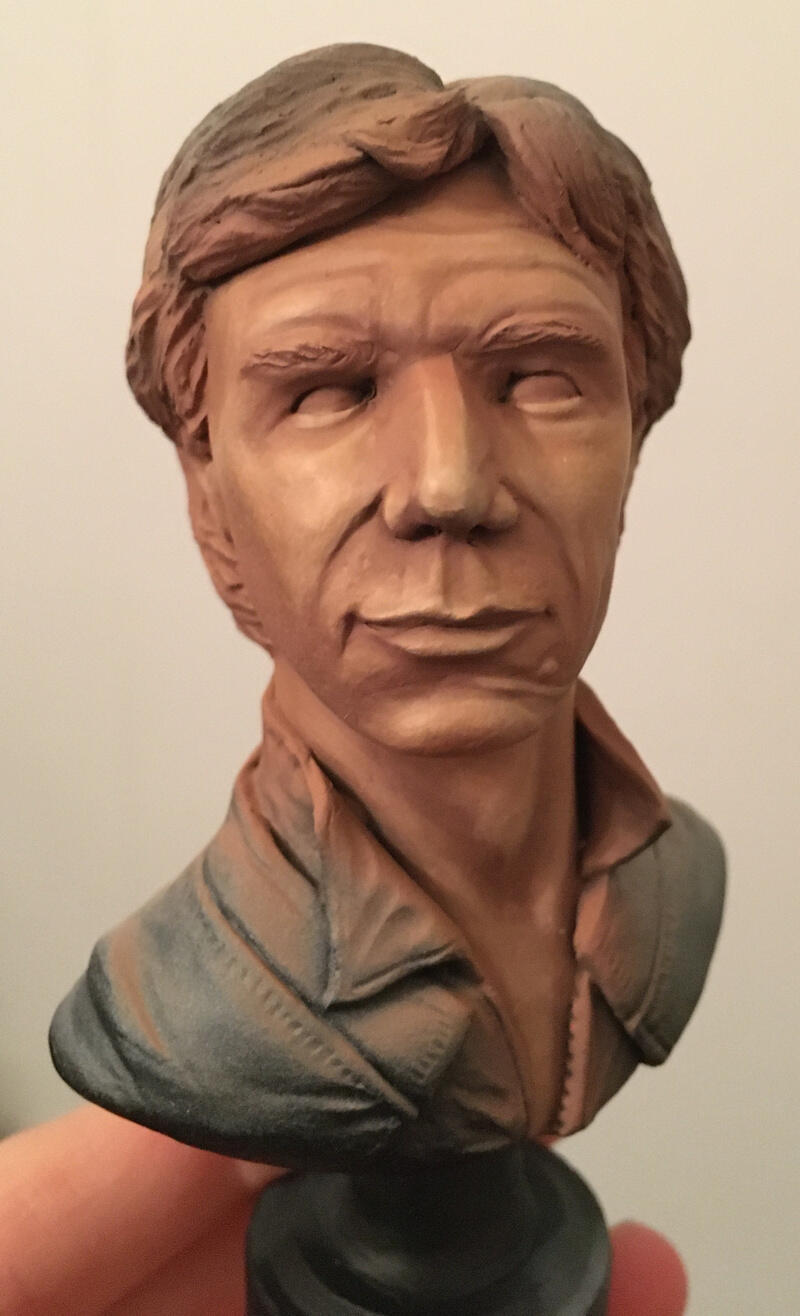
Boy, it feels good to be painting again. Having not picked up a brush since moving to London in September these busts have been a real joy to paint. Sculpted by Reuben Lowde, these resin cast Han and Leia busts are available now on his Etsy store - Reuben very kindly sent me through a pair to paint up for him. This has been the first time I’ve painted something that isn’t a 28mm scale miniature so it’s been a real learning curve, but an incredibly useful one. What was so surprising about the jump to larger-scale was how I found the blending easier? I was expecting with more space the steps would be more obvious, but in fact, having more surface to work with made it easier to get a consistent colour gradient.
Sadly, I didn’t plan ahead and take pictures of every stage but hopefully, the descriptions below should be useful. In any case, it would be great to know your thoughts and any feedback on the formats of these articles - drop your comments below or get in touch on any of my socials!

Prep
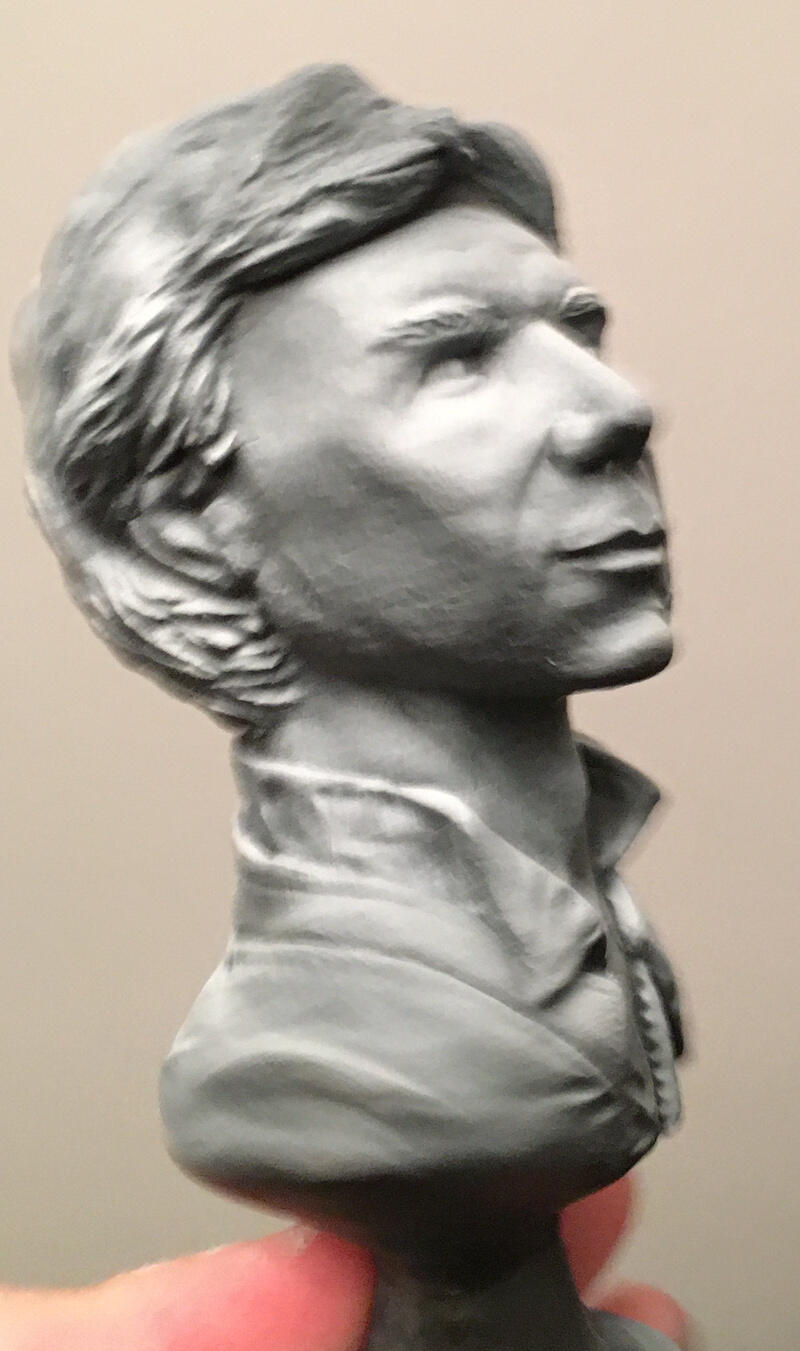
This is the first time I have ever tried zenithal priming, and I’m not gonna lie, once I did it I kind of wanted to just leave it as it is. There is something about all the shading that it naturally applies that I find fascinating. I don’t know if I made use of it the best I could since I largely just basecoated over the top of it, but these pictures I took before I did anything else really helped to guide me with shadow placements as I hadn’t really thought about lighting in this much detail before.
Skin
So the paints I used for the skin were:
- Screamer Pink
- Doombull brown
- Bugman’s Glow
- Cadian Fleshtone
- Kislev Flesh
- Flayed One Flesh
- Ogryn Flesh wash
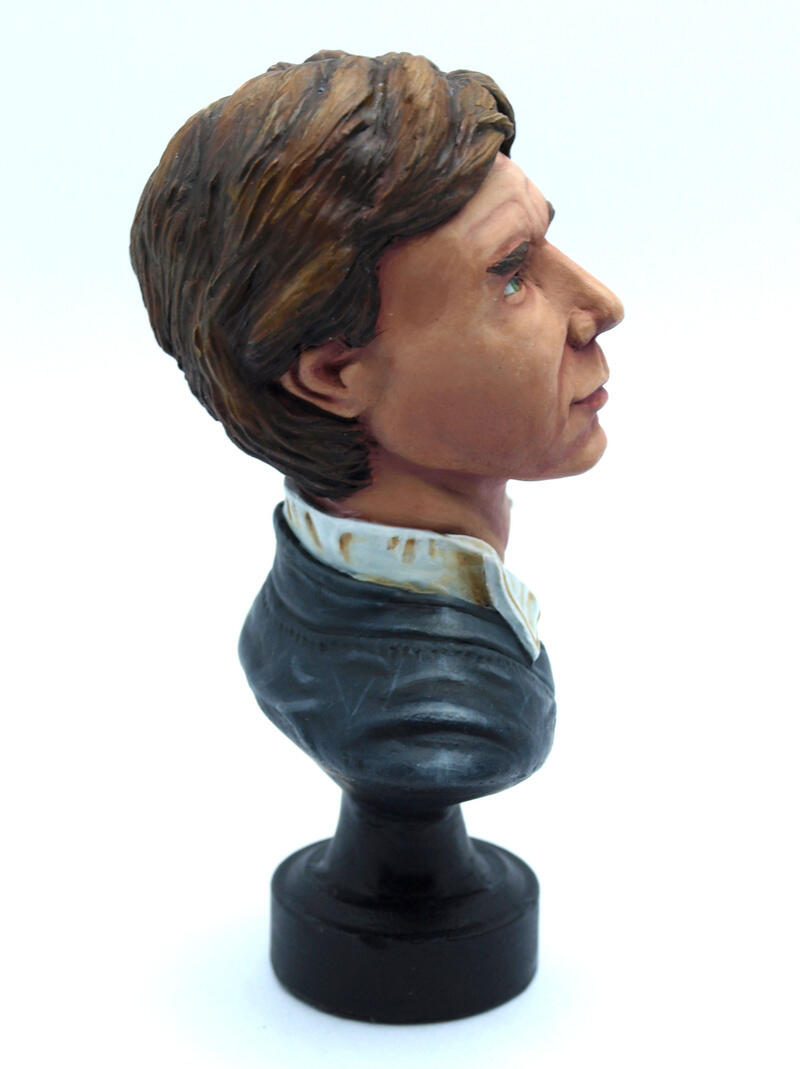
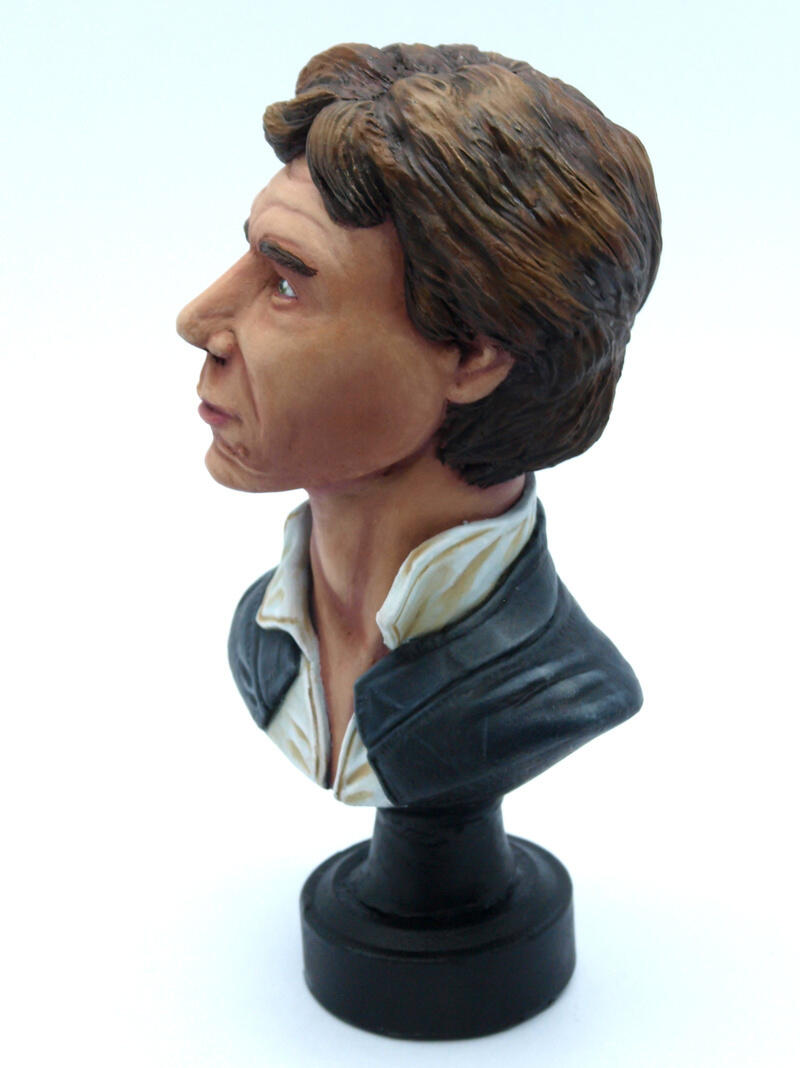
So for Han, starting with a flat base of Bugman’s Glow, I then slowly layered up to Kislev flesh, keeping the paints really thin to glaze them over the areas I wanted to highlight. I usually created a mid-tone between each layer with a 50:50 mix of the darker or lighter paint. For areas that needed darkening down a little bit, particularly the recesses around the nose and eyes, I added in a small amount of screamer pink to the Bugman’s glow for Han, and Doombull brown for Leia. I then took some really thinned down Flayed One flesh to pick out the places the light would hit such as the side of the nose, and forehead.
The lips, I used a thinned down version of the shading colour and glazed that over, I was pleasantly surprised how nice the tone that produced was! Finally, to add a little bit more contrast and warmth to the cheeks, I applied a thin layer of water over the cheek area, and then just glazed some Ogryn flesh into the lower regions. The water all over helps to allow the wash to diffuse a little bit and reduce tide marks.
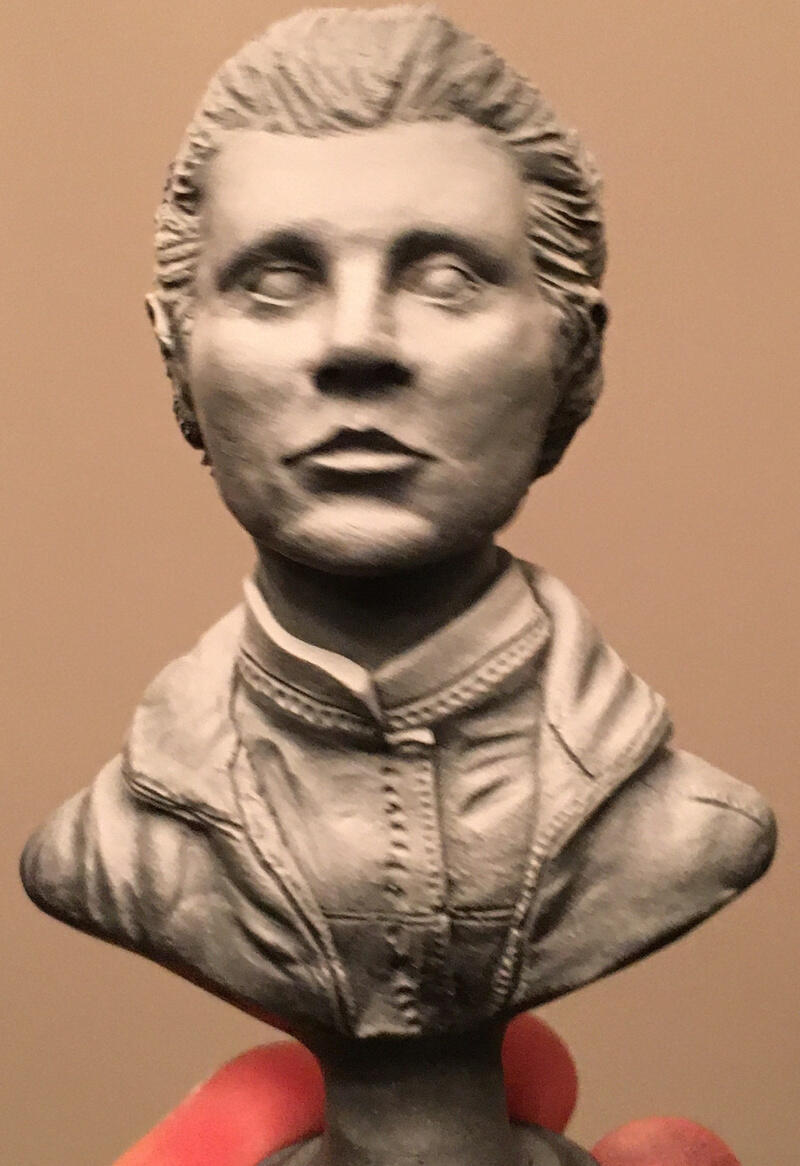
I took a slightly different approach for Leia generally. I still started with Bugmans Glow and layered up to Cadian fleshtone. This time though, now I had done it once I wanted to play a bit more with directional lighting. I added a very small amount of black to the Cadian Fleshtone to de-saturate it a bit and used that in areas not directly exposed to the light. I then highlighted this area with a bit of white added to the mix. I think it worked quite well and the directional lighting is certainly visible on the model, but next time I think I could exaggerate it a little further to make it more obvious.
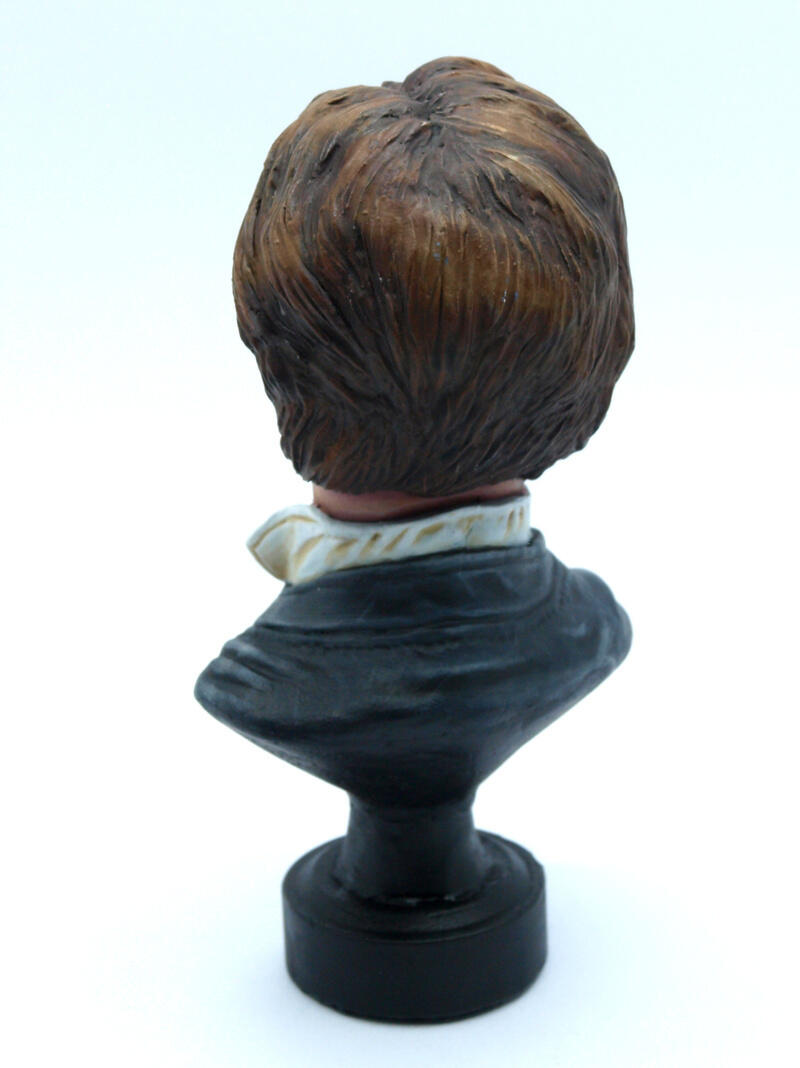
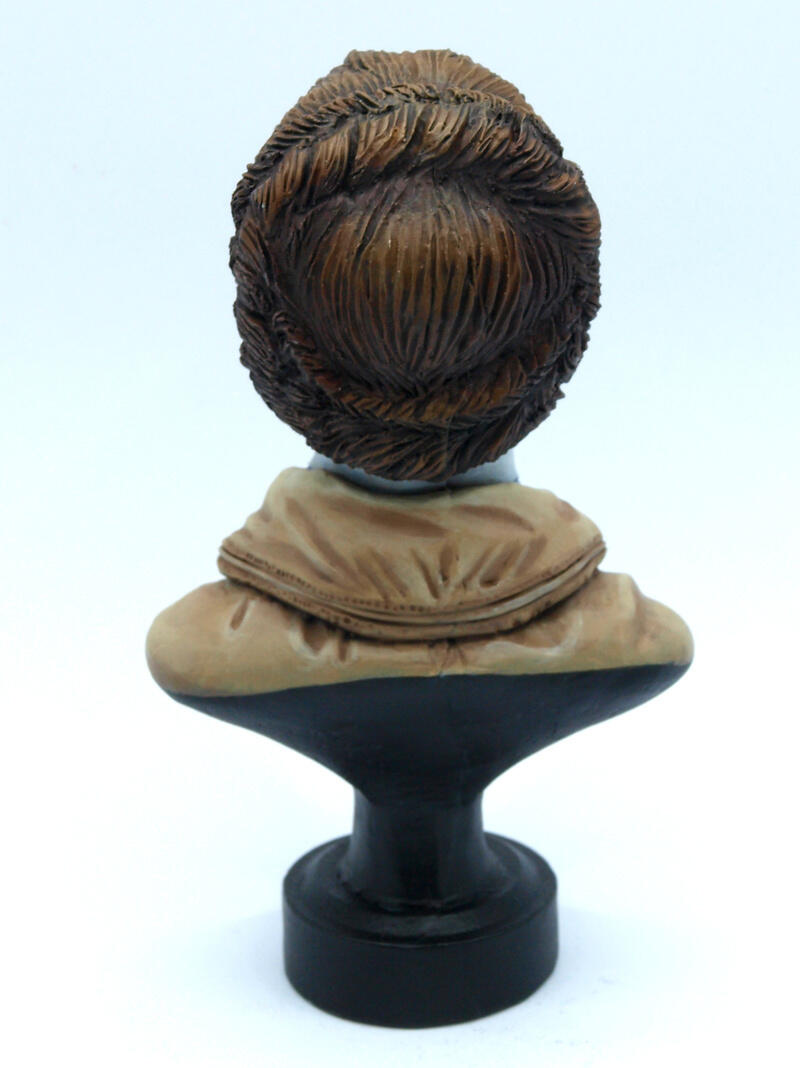
Hair
The hair was done in the same way for both busts:
- Rhinox Hide
- Mournfang Brown
- Leather Brown (Vallejo)
- Agrax Earthshade
Like with the skin I worked up from darkest to lightest mixing a mid-tone between each step. Make sure to keep the paint really thin and have patience with each layer to build up the smooth gradient. While washes don’t normally work as well on large scale features, the hair still has a lot of texture, so I applied a thin all over wash to the hair, being slightly heavier towards the bottom of the hair.
Finally, I applied a light drybrush of Rhinox Hide to the darker areas and Leather Brown to the lighter areas.
Han’s Jacket
I am really happy with this, Corvus Black is probably my favourite colour right now. It’s just enough off-black that there is room for it to be darkened without it looking grey overall.
- Abaddon black
- Corvus black
- Eshin grey
- Dawnstone
- Adiminstratum grey
Starting with Corvus black base, I took a really thin Abaddon black into the areas I wanted to shade. I used this instead of a wash or contrast because you can eventually reach 100% opacity with the acrylic paint vs a wash. I also really liked the slight satin finish of Abaddon black, particularly for the leather jacket. To maximise the contrast, the darkest areas of black would be highlighted right next to it with the lighter greys, as with previous working up with mixed mid-tones and thin glazes.
At about the dawnstone level, I added a couple of small scratches to the leather to give it a bit more texture and aged look. Some of these were then also highlighted with Adiminstratum grey.
Finally, to blend it all together I did a thin glaze of Abaddon black all over to tie together all the highlights a bit more.
Han’s Shirt
- Celestra Grey
- Ulthuan grey
- Ushabti Bone
- Zandri Dust
- Khemri Brown (Old GW)
- White Scar
A base of Celestra grey was used to make it easier to layer up to a pure basecoat of Ulthuan grey. Then using the brown tones I shaded down to the darkest, before highlighting the edges with pure white scar to make the edges pop.
Since there were more purples and browns in Han’s skin tone I thought it was important to make sure the shirt had an overall warm tone to it too. As you can see I took a slightly different approach to Leia’s shirt.
Leia’s Jacket
- Zandri Dust
- Ushabti Bone
- Screaming Skull
- Khemri Brown (Old GW)
- Agrax Earthshade
Working from a flat basecoat I layered up to pure Screaming Skull, carefully glazing to get the smooth transition up to the highlights. Kemri brown was then used to darken the recesses. Zandri dust and Khemri Brown are quite close so I didn’t bother with an intermediate mix. Instead, I wetted the area as I did with the skin, I then glazed the darkest recesses with Agrax Earthshade.
Leia’s Shirt
- Thunderhawk blue
- Fenrisian Grey
- Celestra Grey
- Ulthuan grey
- White Scar
Like with Han’s shirt, Leia’s I worked up to a pure Ulthuan Grey basecoat and then shaded down through Celestra Grey and Fenrisian Grey. A small amount of Thunderhawk blue was then shaded into the deep recesses. Finally, highlight back up to White scar.
Eyes
- Ulthuan Grey
- Mournfang Brown/ Castellan Green
- Leather Brown (Vallejo)/ Loren Forest
- White scar
It’s important to start with an off white for eyes as it gives room for the specular reflections to pop. I kept a thin dark pink line in the shadow between the whites and the eyelids to keep them separated. Then starting with the darkest green or brown I slowly highlighted up the iris like a gem - keeping the highlights only in the bottom corner. Finally, add the specular reflection in the opposite upper corner. For the final touch add a small amount of gloss varnish.
Summary
I’m really proud of these models and it gave me the time to try out techniques and styles that I haven’t touched before on tabletop minis. I was able to play around with cold vs light contrasts, particularly with the shirts, as well as how to create texture on surfaces. I thought I would be painting these as a one-off, but I have to admit now I have the itch to try larger-scale pieces I would definitely be interested in getting some more busts to work with. If you like the look of these be sure to check out Reuben’s Etsy shop to get your own!